VIDEO
Objectifs du projet
Introduction à la commande d’une porte blindée
Savoir commander un actionneur linéaire
Savoir lire un clavier 4×4
Savoir mesurer le courant d’une charge avec Arduino
Savoir programmer la commande d’une porte blindée
Etc.
L’objectif du tuto est de tester le clavier 4×4 avec Arduino. Voir le tuto pour les détails techniques.
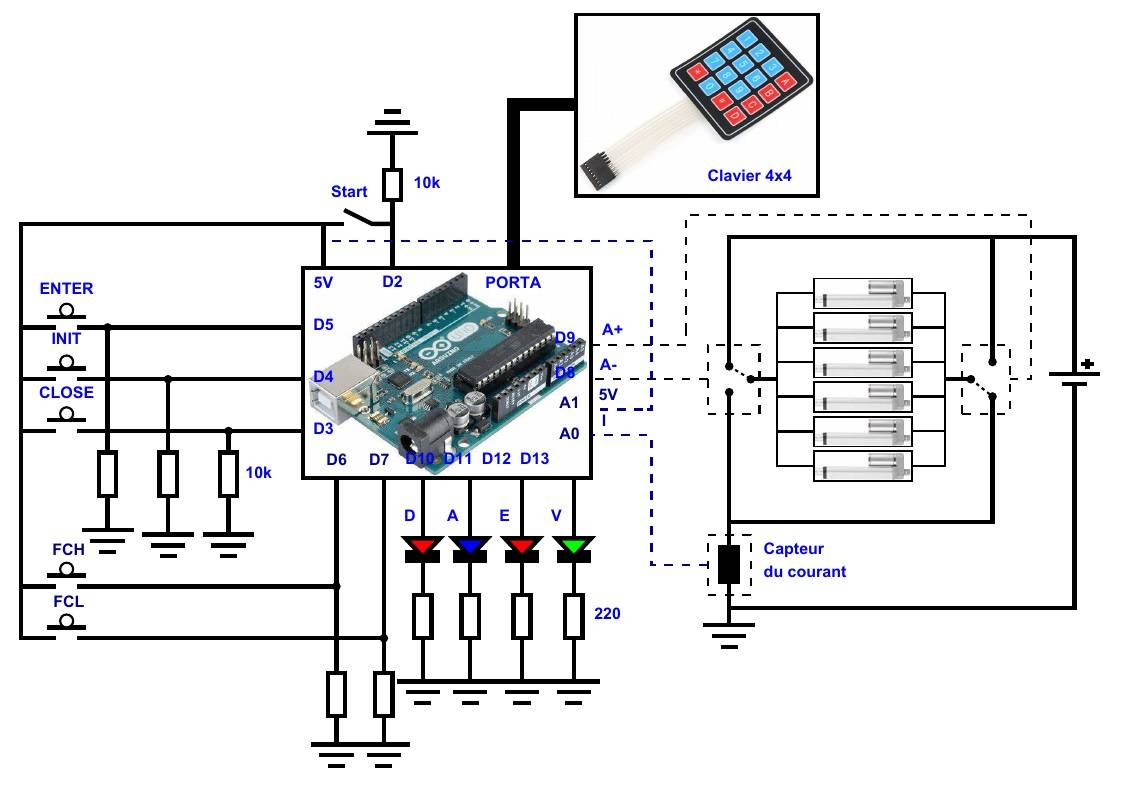
Architecture matérielle
Programme Arduino
#include <Keypad.h>
Obtenir le livre « Codage en C du GRAFCET avec ARDUINO